#include <WiFi.h>
#include <Servo.h>

Servo myservo;  // create servo object to control a servo
// twelve servo objects can be created on most boards

// GPIO the servo is attached to
static const int servoPin = 13;

// Replace with your network credentials
const char* ssid     = "REPLACE_WITH_YOUR_SSID";
const char* password = "REPLACE_WITH_YOUR_PASSWORD";

// Set web server port number to 80
WiFiServer server(80);

// Variable to store the HTTP request
String header;

// Decode HTTP GET value
String valueString = String(5);
int pos1 = 0;
int pos2 = 0;

void setup() {
  Serial.begin(115200);

  myservo.attach(servoPin);  // attaches the servo on the servoPin to the servo object

  // Connect to Wi-Fi network with SSID and password
  Serial.print("Connecting to ");
  Serial.println(ssid);
  WiFi.begin(ssid, password);
  while (WiFi.status() != WL_CONNECTED) {
    delay(500);
    Serial.print(".");
  }
  // Print local IP address and start web server
  Serial.println("");
  Serial.println("WiFi connected.");
  Serial.println("IP address: ");
  Serial.println(WiFi.localIP());
  server.begin();
}

void loop(){
  WiFiClient client = server.available();   // Listen for incoming clients

  if (client) {                             // If a new client connects,
    Serial.println("New Client.");          // print a message out in the serial port
    String currentLine = "";                // make a String to hold incoming data from the client
    while (client.connected()) {            // loop while the client's connected
      if (client.available()) {             // if there's bytes to read from the client,
        char c = client.read();             // read a byte, then
        Serial.write(c);                    // print it out the serial monitor
        header += c;
        if (c == '\n') {                    // if the byte is a newline character
          // if the current line is blank, you got two newline characters in a row.
          // that's the end of the client HTTP request, so send a response:
          if (currentLine.length() == 0) {
            // HTTP headers always start with a response code (e.g. HTTP/1.1 200 OK)
            // and a content-type so the client knows what's coming, then a blank line:
            client.println("HTTP/1.1 200 OK");
            client.println("Content-type:text/html");
            client.println("Connection: close");
            client.println();

            // Display the HTML web page
            client.println("<!DOCTYPE html><html>");
            client.println("<head><meta name=\"viewport\" content=\"width=device-width, initial-scale=1\">");
            client.println("<link rel=\"icon\" href=\"data:,\">");
            // CSS to style the on/off buttons
            // Feel free to change the background-color and font-size attributes to fit your preferences
            client.println("<style>body { text-align: center; font-family: \"Trebuchet MS\", Arial; margin-left:auto; margin-right:auto;}");
            client.println(".slider { width: 300px; }</style>");
            client.println("<script src=\"https://ajax.googleapis.com/ajax/libs/jquery/3.3.1/jquery.min.js\"></script>");

            // Web Page
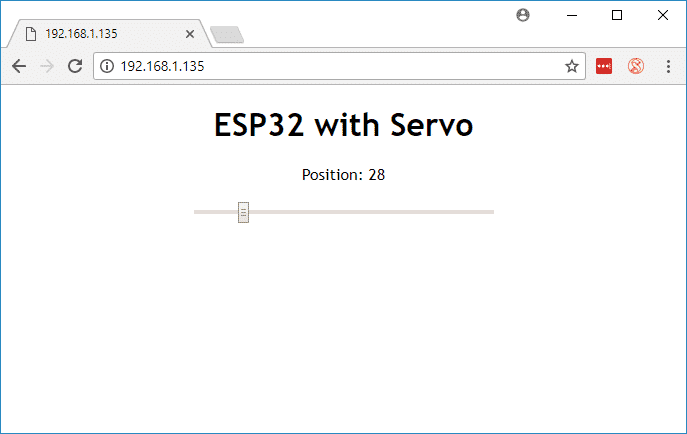
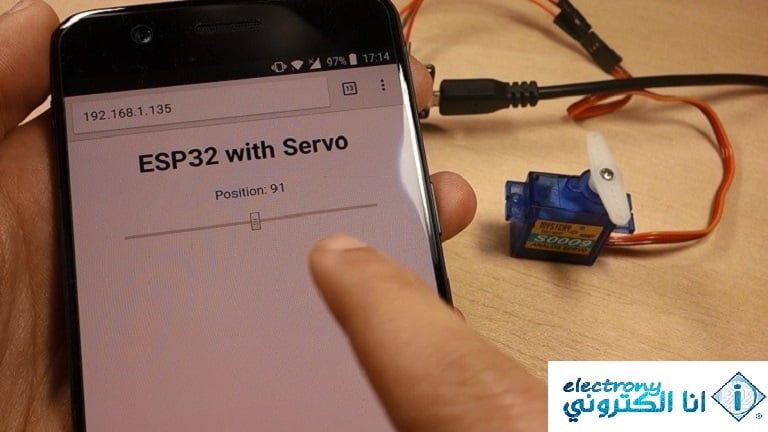
            client.println("</head><body><h1>ESP32 with Servo</h1>");
            client.println("<p>Position: <span id=\"servoPos\"></span></p>");
            client.println("<input type=\"range\" min=\"0\" max=\"180\" class=\"slider\" id=\"servoSlider\" onchange=\"servo(this.value)\" value=\""+valueString+"\"/>");

            client.println("<script>var slider = document.getElementById(\"servoSlider\");");
            client.println("var servoP = document.getElementById(\"servoPos\"); servoP.innerHTML = slider.value;");
            client.println("slider.oninput = function() { slider.value = this.value; servoP.innerHTML = this.value; }");
            client.println("$.ajaxSetup({timeout:1000}); function servo(pos) { ");
            client.println("$.get(\"/?value=\" + pos + \"&\"); {Connection: close};}</script>");

            client.println("</body></html>");

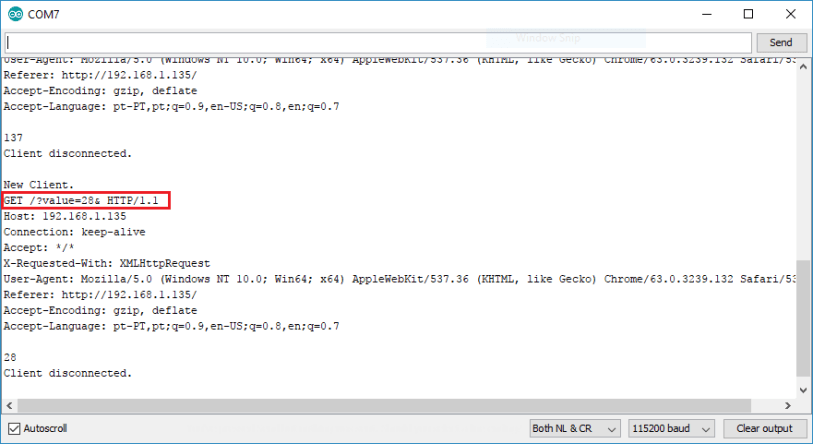
            //GET /?value=180& HTTP/1.1
            if(header.indexOf("GET /?value=")>=0) {
              pos1 = header.indexOf('=');
              pos2 = header.indexOf('&');
              valueString = header.substring(pos1+1, pos2);

              //Rotate the servo
              myservo.write(valueString.toInt());
              Serial.println(valueString);
            }
            // The HTTP response ends with another blank line
            client.println();
            // Break out of the while loop
            break;
          } else { // if you got a newline, then clear currentLine
            currentLine = "";
          }
        } else if (c != '\r') {  // if you got anything else but a carriage return character,
          currentLine += c;      // add it to the end of the currentLine
        }
      }
    }
    // Clear the header variable
    header = "";
    // Close the connection
    client.stop();
    Serial.println("Client disconnected.");
    Serial.println("");
  }
}


